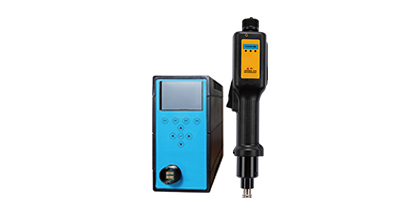
The torque adjustment function of the intelligent electric screwdriver is the key to ensuring the quality of screw locking.Correct use of this function can prevent the screws from being tightened due to excessive torque,which may cause component damage,or due to insufficient torque,which may lead to loosening.To make reasonable use of this function,the following steps and key points can be followed.
The preparatory work before use is of vital importance.First of all,it is necessary to clarify the requirements for the screws and components to be locked.Screws of different specifications,components of different materials and thicknesses have different demands for torque.For instance,the micro screws in small electronic devices require less torque.In mechanical structures,large screws require a considerable torque to be tightened.You can refer to the product manual or relevant technical materials to learn about the torque range of screws and components.At the same time,it is necessary to check the status of the intelligent electric screwdriver itself to ensure that the screwdriver has sufficient power,all components are properly connected,and there is no loosening or damage.This is to avoid the torque adjustment and usage effect being affected by the screwdriver's own problems.

Start the torque adjustment operation.Most smart electric screwdrivers are equipped with dedicated torque adjustment devices or operation interfaces.If it is a knob-type adjustable smart electric screwdriver,find the torque adjustment knob.Usually,there will be scale marks on the knob.Rotate the knob in the direction marked,and the torque value can be increased or decreased.During the adjustment process,slowly turn the knob and observe the change in the torque value displayed by the electric screwdriver,then adjust it to the required range.For the smart electric screwdriver with a display screen and key operation,first press the corresponding setting key to enter the torque adjustment mode,then select the torque value through the up and down keys,and finally press the confirmation key to complete the setting.When making adjustments,pay attention to the accuracy of the values and do not set them blindly.Each adjustment should be made in combination with the actual requirements of the screws and components.
The verification and adjustment after adjustment are indispensable.After the torque adjustment is completed,do not directly perform batch screw locking;instead,conduct a trial locking.Select the same screws and components as in actual production,and use an intelligent electric screwdriver with adjusted torque to perform screw locking operations.After the locking is completed,check the tightness of the screws.The screws can be visually inspected to see if they are fully screwed in and if there is any tilting or slippage.You can also manually gently shake the component to feel the tightness of the screw.If it is found that the screws are not tightened firmly,it indicates that the torque setting is too small.The torque value needs to be increased again and the trial locking should be conducted once more.If there are situations such as screw slippage or component damage,it indicates that the torque is too large.The torque should be appropriately reduced until a suitable tightening effect is achieved.
During daily use,as the screw specifications change and the material of the components varies,it is necessary to readjust the torque of the smart electric screwdriver in a timely manner.At the same time,the torque accuracy of the electric screwdriver should be calibrated regularly,as after long-term use,the torque of the electric screwdriver may deviate to a certain extent,affecting the quality of screw locking.By using the torque adjustment function of the intelligent electric screwdriver in a standardized and accurate manner,the smooth progress of screw locking work can be guaranteed and the quality of product assembly can be improved.